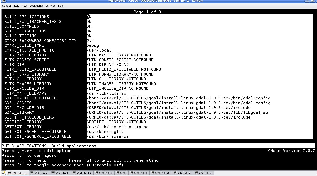
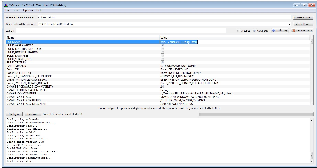
Figure 2.1: CMake interface. Top) ccmake, the UNIX version based on curses. Bottom) CMakeSetup, the
MS-Windows version based on MFC.
There are two ways to install OTB on your system: installing from a binary distribution or compiling from sources. You can find information about the installation of binary packages for OTB and Monteverdi in the OTB-Cookbook.
This chapter covers the compilation of OTB from source. Note that it also includes the compilation of Monteverdi which is integrated as an OTB module since version 5.8.
OTB has been developed and tested across different combinations of operating systems, compilers, and hardware platforms including Windows, GNU/Linux and macOS. It is known to work with the following compilers in 32/64 bit:
Since release version 6.2.0, OTB is compiled using the C++14 standard by default.
The challenge of supporting OTB across platforms has been solved through the use of CMake, a cross-platform, open-source build system. CMake is used to control the software compilation process using simple platform and compiler independent configuration files. CMake generates native makefiles and workspaces that can be used in the compiler environment of your choice. CMake is quite sophisticated: it supports complex environments requiring system configuration, compiler feature testing, and code generation.
CMake supports several generators to produce the compilation scripts, dependending on the platform and compiler. It can use:
The information used by CMake is provided by CMakeLists.txt files that are present in every directory of the OTB source tree. These files contain information that the user provides to CMake at configuration time. Typical information includes paths to utilities in the system and the selection of software options specified by the user.
There are (at least) two ways to use CMake :
As shown in figure 2.1, CMake has a different interfaces according to your system. Refer to section 2.1 for GNU/Linux and macOS build instructions and 2.2 for Windows.
For more information on CMake, check :
OTB depends on a number of external libraries. Some are mandatory, meaning that OTB cannot be compiled without them, while others (the majority) are optional and can be activated or not during the build process. See table 2.1 for the full list of dependencies.
Library | Web site | Mandatory | Minimum version |
ITK | yes | 4.6.0 |
|
GDAL | yes | 1.10 (2.x also supported) |
|
OSSIM | yes | 1.8.20-3 |
|
libgeotiff | yes | - |
|
boost | yes | - |
|
openthreads | yes | - |
|
tinyXML | yes | - |
|
6S | no | - |
|
Curl | no | - |
|
FFTW | no | - |
|
GLEW | no | - |
|
GLFW | no | 3 |
|
GLUT | no | - |
|
libKML | no | 1.2 |
|
libSVM | no | 2.0 |
|
Mapnik | no | 2.x |
|
MPI | no | - |
|
MuParser | no | - |
|
MuParserX | no | 4.0.7 |
|
OpenCV | no | 2 (3.x also supported) |
|
OPENGL | no | - |
|
Qt | no | 5 |
|
QWT | no | 6 |
|
Shark | no | 3.1 |
|
SiftFast | no | - |
|
SPTW | no | - |
|
The first thing to do is to create a directory for working with OTB. This guide will use ~/OTB but you are free to choose something else. In this directory, there will be three locations:
To setup this structure, the following commands can be used:
The OTB project uses a git branching model where develop is the current development version. It contains the latest patches and represents the work in progress towards the next release. For more information regarding the use of Git in the project please have a look at : http://wiki.orfeo-_toolbox.org/index.php/Git. See the contributing.md (https://gitlab.orfeo-_toolbox.org/orfeotoolbox/otb/blob/develop/CONTRIBUTING.md) to have more inforamtion on how to contribute to OTB.
Checkout the relevant branch now:
Now you must decide which build method you will use. There are two ways of compiling OTB from sources, depending on how you want to manage dependencies. Both methods rely on CMake.
If you do not know which method to use and just want to compile OTB with all its modules, use SuperBuild.
CMake variable | Value |
CMAKE_INSTALL_PREFIX | Installation directory, target for make install |
BUILD_EXAMPLES | Activate compilation of OTB examples |
BUILD_TESTING | Activate compilation of the tests |
OTB_BUILD_DEFAULT_MODULES | Activate all usual modules, required to build the examples |
OTB_USE_XXX | Activate module XXX |
OTBGroup_XXX | Enable modules in the group XXX |
OTB_DATA_ROOT | otb-data repository |
OTB_WRAP_PYTHON | Enable Python wrapper |
OTB_WRAP_JAVA | Enable Java wrapper |
SuperBuild only
| |
DOWNLOAD_LOCATION | Location to download dependencies |
USE_SYSTEM_XXX | Use the system’s XXX library |
If you want to use a standalone binary package, a lot of dependencies are already supplied in it. In this case, it is advised to use all of the dependencies from that package. Mixing system libraries with libraries from OTB package may not be safe. When you call the otbenv script in the package, it will add an environment variable CMAKE_PREFIX_PATH, pointing to the root of the OTB package. This variable is used by CMake as a hint to detect the dependencies location.
The SuperBuild is a way of compiling dependencies to a project just before you build the project. Thanks to CMake and its ExternalProject module, it is possible to download a source archive, configure and compile it when building the main project. This feature has been used in other CMake-based projects (ITK, Slicer, ParaView,...). In OTB, the SuperBuild is implemented with no impact on the library sources : the sources for SuperBuild are located in the ’OTB/SuperBuild’ subdirectory. It is made of CMake scripts and source patches that allow to compile all the dependencies necessary for OTB. Once all the dependencies are compiled and installed, the OTB library is built using those dependencies.
OTB’s compilation is customized by specifying configuration variables. The most important configuration variables are shown in table 2.2. The simplest way to provide configuration variables is via the command line -D option:
A pre-load script can also be used with the -C options (see https://cmake.org/cmake/help/v3.4/manual/cmake.1.html#options). Another option is to set variables manually with cmake-gui or ccmake.
Please note that the CMAKE_INSTALL_PREFIX variable is important because the SuperBuild will install some targets during the compilation step. Therefore this directory will be used even if you don’t use make install target. In fact there is no make install target for the SuperBuild. Also note that if not specified to cmake, a default install dir will be used, located in ../superbuild_install.
By default, SuperBuild will not use any of libraries installed on system. All USE_SYSTEM_XXX are set to FALSE. This is our recommended way of using SuperBuild. You are however free to use a system library if you want!. You must be very much aware of dependencies of those libraries you use from system. For example, if libjpeg is not used from superbuild then you should not use zlib from superbuild because zlib is a dependency of libjpeg. Here SuperBuild will NOT set USE_SYSTEM_ZLIB=FALSE. One must re-run cmake with -DUSE_SYSTEM_ZLIB=FALSE. Above example of libjpeg-zlib dependency is so simple. Imagine the case for GDAL which depends on zlib, libjpeg, libtiff(with big tiff support), geotiff, sqlite, curl, geos, libkml, openjpeg. This is one of the reasons we recommend to use SuperBuild exclusively.
All dependencies are configured and built in a way that help us to get an efficient build OTB. So we enable geotiff (with proj4 support), openjpeg, geos in GDAL build.
(see table 2.2).
SuperBuild downloads dependencies into the DOWNLOAD_LOCATION directory, which will be ~/OTB/build/Downloads in our example. Dependencies can be downloaded manually into this directory before the compilation step. This can be useful if you wish to bypass a proxy, intend to compile OTB without an internet connection, or other network constraint. You can find an archive with sources of all our dependencies on the Orfeo ToolBox website (pick the ’SuperBuild-archives’ corresponding to the OTB version you want to build) :
Qt library: Unlike other dependencies, building Qt5 on all platforms is not a trivial task but OTB SuperBuild does its level best to facilitate this for the user. So there is still some additional package installation, one has to do as a pre-requistie for SuperBuild On a GNU/Linux you must have Qt X11 dependencies installed. See Qt 5 documentation for the list of packages that need to be installed before starting superbuild. https://doc.qt.io/qt-5/linux-requirements.html. For a Debian 8.1 system, all Qt5 dependencies can be installed with the following ’apt-get install’ command: apt-get install libx11-dev libxext-dev libxt-dev libxi-dev libxrandr-dev libgl-dev libglu-dev libxinerama-dev libxcursor-dev
You can also deactivate Qt5 and skip this by passing -DOTB_USE_QT=OFF to cmake, but this will install OTB without Monteverdi, Mapla and the GUI application launchers.
For macOS you need to install XCode and Windows 7,8.1,10 requires MSVC 2015 or higher.
You are now ready to compile OTB! Simply use the make command (other targets can be generated with CMake’s -G option):
Applications will be located in the bin/ directory in CMAKE_INSTALL_PREFIX directory, which in our case is /OTB/install/bin/. For example:
will launch the command line version of the ExtractROI application, while:
will launch the graphical version.
In order to ensure access to your OTB build from anywhere within your system, we recommend setting the following environment variables. Firstly, add bin/ directory to your PATH for easy access:
Secondly, add the lib/ directory to your LD_LIBRARY_PATH:
Monteverdi is integrated as an OTB module since release 5.8 and it is compiled by the SuperBuild (provided that GLEW, GLUT, OPENGL, Qt and QWT modules are activated).
To use OTB applications from within Monteverdi you will need to define the OTB_APPLICATION_PATH environment variable.
A wiki page detailing the status of SuperBuild on various platforms is also available here: http://wiki.orfeo-_toolbox.org/index.php/SuperBuild.
Once all OTB dependencies are availables on your system, use CMake to generate a Makefile:
The script configuration.cmake needs to contain dependencies location if CMake cannot find them automatically. This can be done with the XXX_DIR variables containing the directories which contain the FindXXX.cmake scripts, or with the XXX_INCLUDEDIR and XXX_LIBRARY variables.
Additionally, decide which module you wish to enable, together with tests and examples. Refer to table 2.2 for the list of CMake variables.
Since OTB is modularized, it is possible to only build some modules instead of the whole set. To deactivate a module (and the ones that depend on it) switch off the CMake variable OTB_BUILD_DEFAULT_MODULES, configure, and then switch off each Module_module_name variable. To provide an overview on how things work, the option COMPONENTS of the CMake command find_package is used in order to only load the requested modules. This module-specific list prevents CMake from performing a blind search; it is also a convienent way of monitoring the dependencies of each module.
Some of the OTB capabilities are considered as optional, and you can deactivate the related modules thanks to a set of CMake variables starting with OTB_USE_XXX. Table 2.3 shows which modules are associated to these variables. It is very important to notice that these variable override the variable OTB_BUILD_DEFAULT_MODULES.
You are now ready to compile OTB! Simply use the make command (other targets can be generated with CMake’s -G option):
The installation target will copy the binaries and libraries to the installation location:
| CMake variable | 3rd party module | Modules depending on it |
| OTB_USE_LIBKML | OTBlibkml | OTBKMZWriter OTBIOKML OTBAppKMZ |
| OTB_USE_QT | OTBQt | OTBQtWidget |
| OTB_USE_QWT | OTBQwt | OTBMonteverdiGUI OTBMonteverdi |
| OTB_USE_GLEW | OTBGlew | OTBIce OTBMonteverdiGUI OTBMonteverdi |
| OTB_USE_OPENGL | OTBOpenGL | OTBIce OTBMonteverdiGUI OTBMonteverdi |
| OTB_USE_CURL | OTBCurl |
|
| OTB_USE_MUPARSER | OTBMuParser | OTBMathParser OTBDempsterShafer OTBAppClassification OTBAppMathParser OTBAppStereo OTBAppProjection OTBAppSegmentation OTBRoadExtraction OTBRCC8 OTBCCOBIA OTBMeanShift |
| OTB_USE_MUPARSERX | OTBMuParserX | OTBMathParserX OTBAppMathParserX |
| OTB_USE_LIBSVM | OTBLibSVM | optional for OTBSupervised OTBAppClassification |
| OTB_USE_OPENCV | OTBOpenCV | optional for OTBSupervised OTBAppClassification |
| OTB_USE_SHARK | OTBShark | optional for OTBSupervised OTBAppClassification |
| OTB_USE_MAPNIK | OTBMapnik | OTBVectorDataRendering |
| OTB_USE_6S | OTB6S | OTBOpticalCalibration OTBAppOpticalCalibration OTBSimulation |
| OTB_USE_SIFTFAST | OTBSiftFast |
|
Everything that is needed for OTB development on Windows, including compiling from source, is covered in details on the OTB wiki at:
Please check https://gitlab.orfeo-_toolbox.org/orfeotoolbox/otb/issues with an updated list of known issues (tag bug).