The new OTB live CD is out! On the program is the brand new OTB 2.6 (which came out last week) with the new Xubuntu 8.10 (which came out also last week coincidentally).
It’s just as usual: download it from http://www.orfeo-toolbox.org/otblive/, burn it on a CD, put it on a computer and restart.
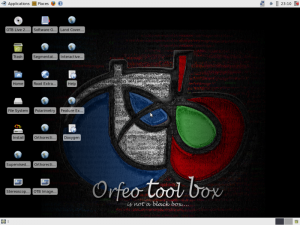
This is the screen you should get:
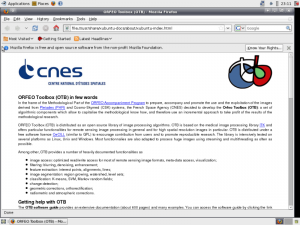
To help you get started with OTB, follow the guide on the help page:
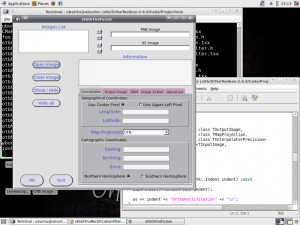
You can also try the numerous applications directly out of the box:
Now, a few more word on what’s going on behind the scene to build this CD. All this process is coming from various sources (Gnu Linux Magazine France, several websites, tons of trial and errors).
First, you need to get the iso image from the latest xubuntu (www.xubuntu.org). We are going to unpack all this to be able to work on it. Go into your working directory (start from a clean one, you’ll be putting a lot of mess there), and make sure you have at least 5GB free.
mkdir mnt
sudo mount -o loop xubuntu-8.10-desktop-i386.iso mnt

mkdir extract-cd
rsync --exclude=/casper/filesystem.squashfs -a mnt/ extract-cd

sudo modprobe squashfs
mkdir squashfs
sudo mount -t squashfs -o loop mnt/casper/filesystem.squashfs squashfs

mkdir edit
sudo cp -a squashfs/* edit/

sudo umount squashfs
sudo umount mnt
Now, you have unpacked all the system, you can ‘chroot’ yourself on it:
sudo cp /etc/resolv.conf edit/etc/
sudo cp /etc/hosts edit/etc/

sudo chroot edit
mount -t proc none /proc
mount -t sysfs none /sys
export LC_ALL=C
Here, you are root on the live cd system, all the command you pass in this environment won’t affect your own computer. The few lines above are required every time you have to go in the chroot environment. Some of the modification below will require you to go in and out. In this case, it’s better to keep two terminals open.
Now that we are here, we need to make some space for OTB. Don’t forget that everything has to fit on 700MB. Actually as the filesystem is compressed (squashfs), you can count on around 2GB.
aptitude update
dpkg-query -W --showformat='${Installed-Size} ${Package}n'| sort -nr | less
aptitude remove --purge thunderbird
aptitude remove --purge gnome-games-extra-data gnome-games gnome-games-data gnome-games-servers
aptitude remove --purge gimp gimp-data gimp-help-common gimp-help-en libgimp2.0
aptitude remove --purge gnumeric-common gnumeric-doc gnumeric-gtk gnumeric-plugins-extra gnumeric
You can choose what you want according to your own taste. One part which is quite space consuming is the localization packages. They can be removed by:
aptitude remove --purge `dpkg-query -W --showformat='${Package}n' | grep language-pack | egrep -v '-(en|fr)'`
Usually, I keep only the two official languages for OTB: English and French.
Now we need to remove some libraries which became unused:
vim /etc/apt/sources.list
Uncomment the two lines:
#deb http://archive.ubuntu.com/ubuntu intrepid universe
#deb-src http://archive.ubuntu.com/ubuntu intrepid universe
and run deborphan:
aptitude update
aptitude install gedit
aptitude install deborphan

aptitude remove --purge `deborphan`
aptitude remove --purge `deborphan`
aptitude remove --purge `deborphan`
It’s time to fill up some of the space we’ve just freed and install the libraries necessary for OTB:
aptitude install libglu1-mesa-dev
aptitude install cmake g++ libgdal1-1.5.0 libgdal1-dev libfltk1.1 libfltk1.1-dev fluid libcurl4-gnutls-dev libfftw3-dev
ln -s /usr/lib/libgdal1.5.0.so  /usr/lib/libgdal.so
mkdir /otb
From outside of the chroot (normal environment), you can copy OTB sources and documentation:
sudo cp -r OrfeoToolbox-2.6.0 edit/otb
sudo cp -r OrfeoApplications-2.6.0 edit/otb
sudo cp OTBSoftwareGuide-2.6.pdf edit/otb
sudo cp -r Doxygen/ edit/otb/
Now, in the chroot, you can compile OTB libs and applications:
cd otb
mkdir OTB-Binary
mkdir OTB-Binary-Applications
cd OTB-Binary
ccmake ../OrfeoToolbox-2.6.0/

c
CMAKE_BUILD_TYPE -> Release
OTB_USE_CURL -> ON
USE_FFTWD -> ON
c
g

make -j 2

cd ../OTB-Binary-Applications
ccmake ../OrfeoApplications-2.6.0/
c
e
OTB_DIR -> /otb/OTB-Binary/
CMAKE_BUILD_TYPE -> Release
c
c
g

make -j 2
Now, you have all the basic ready. In another post later on, we may cover some personalization issues (start logo, splash screens, etc).
We are now going to build the CD. Before that, clean the mess you’ve create on the chroot (you don’t want your typos to be burnt on hundreds of CDs around the world):
aptitude clean
rm -rf /tmp/*
rm /etc/resolv.conf
echo "127.0.0.1 localhost" > /etc/hosts
umount /proc
umount /sys
rm -rf ~/.bash_history
exit
We are now going to update the list of packages on the live CD:
chmod +w extract-cd/casper/filesystem.manifest
sudo chroot edit dpkg-query -W --showformat='${Package} ${Version}n' > extract-cd/casper/filesystem.manifest
sudo cp extract-cd/casper/filesystem.manifest extract-cd/casper/filesystem.manifest-desktop
sudo sed -ie '/ubiquity/d' extract-cd/casper/filesystem.manifest-desktop
Then we need to rebuild the compressed filesystem:
sudo rm -rf extract-cd/casper/filesystem.squashfs
sudo mksquashfs edit extract-cd/casper/filesystem.squashfs
Add the checksum:
sudo -s
rm extract-cd/md5sum.txt
(cd extract-cd && find . -type f -print0 | xargs -0 md5sum > md5sum.txt)
exit
And build the iso image:
cd extract-cd
sudo genisoimage -r -V "OTB Live 2.6.0" -publisher "Somebody" -p "You" -cache-inodes -J -l -b isolinux/isolinux.bin -c isolinux/boot.cat -no-emul-boot -boot-load-size 4 -boot-info-table -o ../otblive-2.6.0.iso .
cd ..
Now you have the image, you can give it a try before burning it by using qemu/kvm:
kvm -cdrom otblive-2.6.0.iso -boot d -m 512
All this process should be working quite well, it has be tested with Xubuntu 8.10 Intrepid, 8.04 Hardy, 7.10 Gutsy and with OTB 2.0, 2.2, 2.5 (unofficial) and 2.6. The hardest part is usually to be able to fit everything on the 700MB of the CD. Using a live USB key is a relief, but more on that later…


